
Finding the perfect balance between home organization and aesthetic lighting can be a challenge. Enter the Modern Multi-Functional Floor Lamp from Ercmck—a piece that doesn’t just light up a room; it transforms it.
Whether you're looking to save space in a cozy apartment or add a touch of "Japandi" or Mid-Century Modern flair to your living room, this lamp is a game-changer. In this post, we’ll dive into why this lamp is a must-have and walk you through the simple 7-step assembly process.
Why We Love the Multi-Functional Floor Lamp
This isn't your average light fixture. Here’s why it’s trending in interior design circles:
• Space-Saving Design: It features integrated wooden shelving, perfect for small indoor plants, books, or your morning coffee.
• Built-in Storage: The sturdy base doubles as a storage bin, ideal for stowing away extra throw blankets or magazines.
• Warm Ambiance: The unique ribbed lampshade diffuses light beautifully, creating a soft, welcoming glow that’s perfect for evening relaxation.
• Adjustable Height: Customize the lamp's stature to fit perfectly next to your sofa or favorite reading chair.
Step-by-Step Installation Guide
Don't let the "assembly required" label intimidate you. Setting up your Ercmck lamp is straightforward. Follow these steps to get glowing in no time:
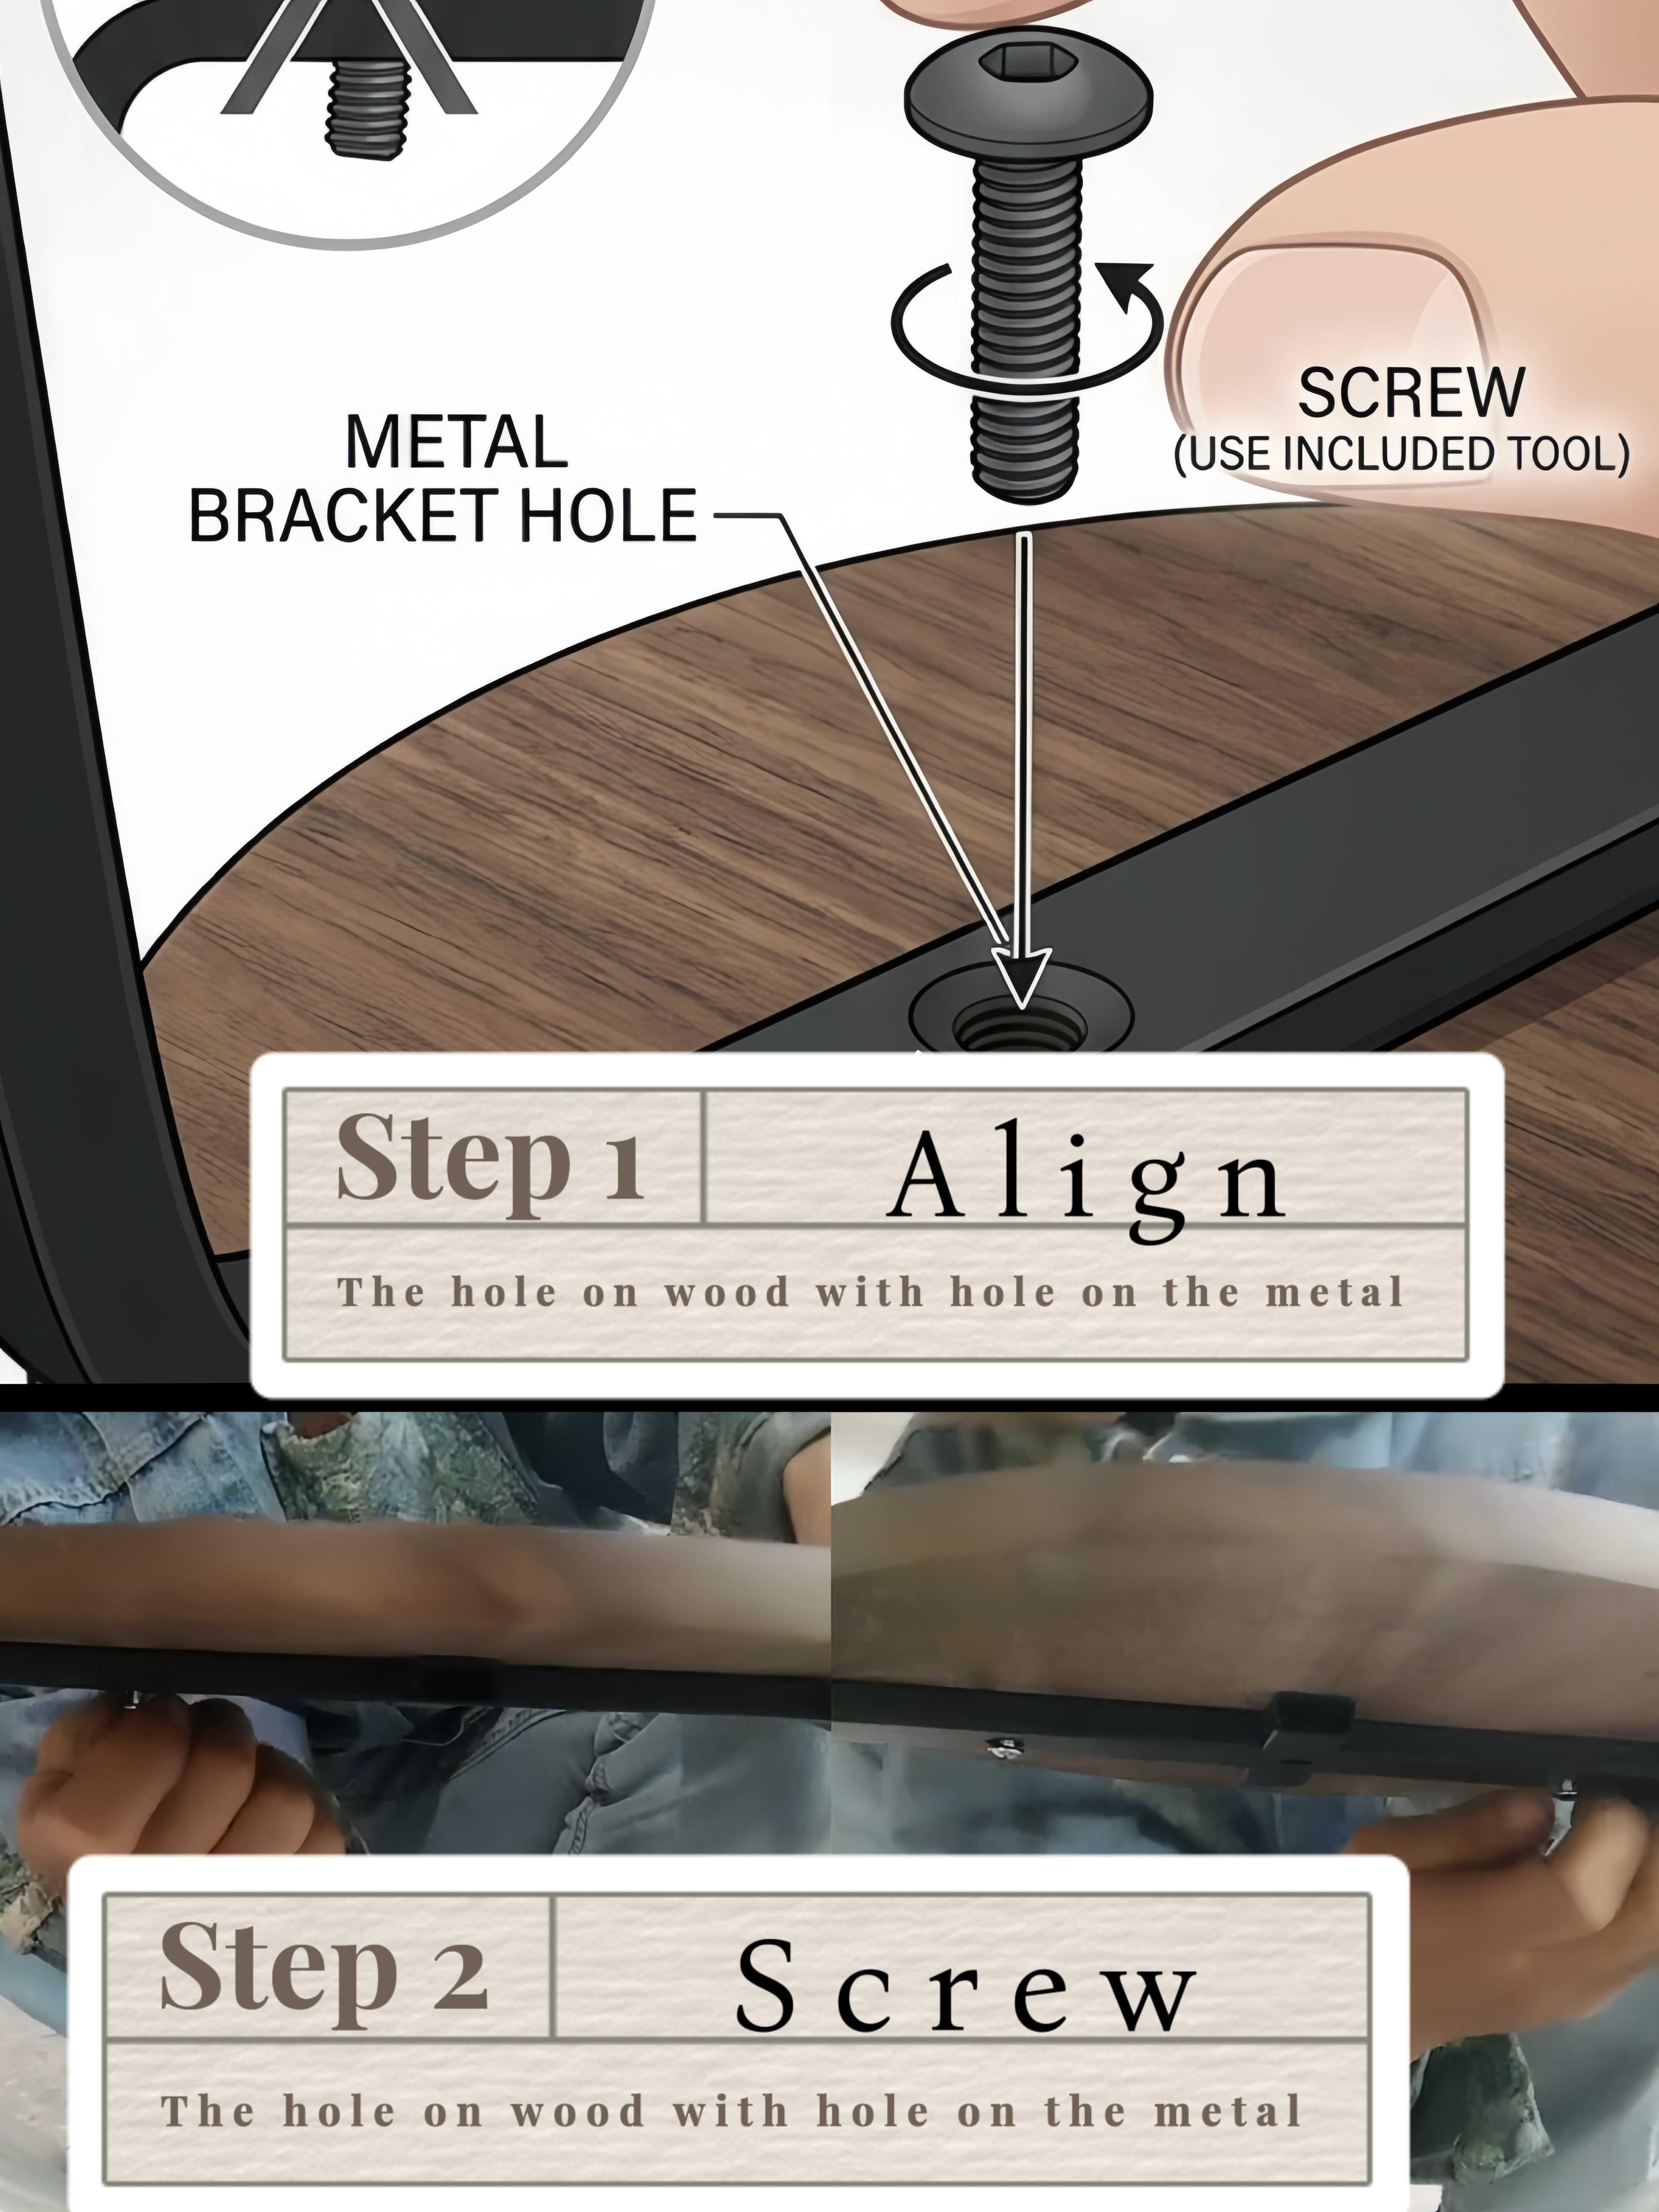
Phase 1: Shelving & Frame
• Step 1: Align. Place the wooden shelf onto the metal bracket. Ensure the pre-drilled hole in the wood aligns perfectly with the hole on the metal frame.
• Step 2: Screw. Insert the provided screw through the metal bracket into the wood. Use the included tool to tighten.
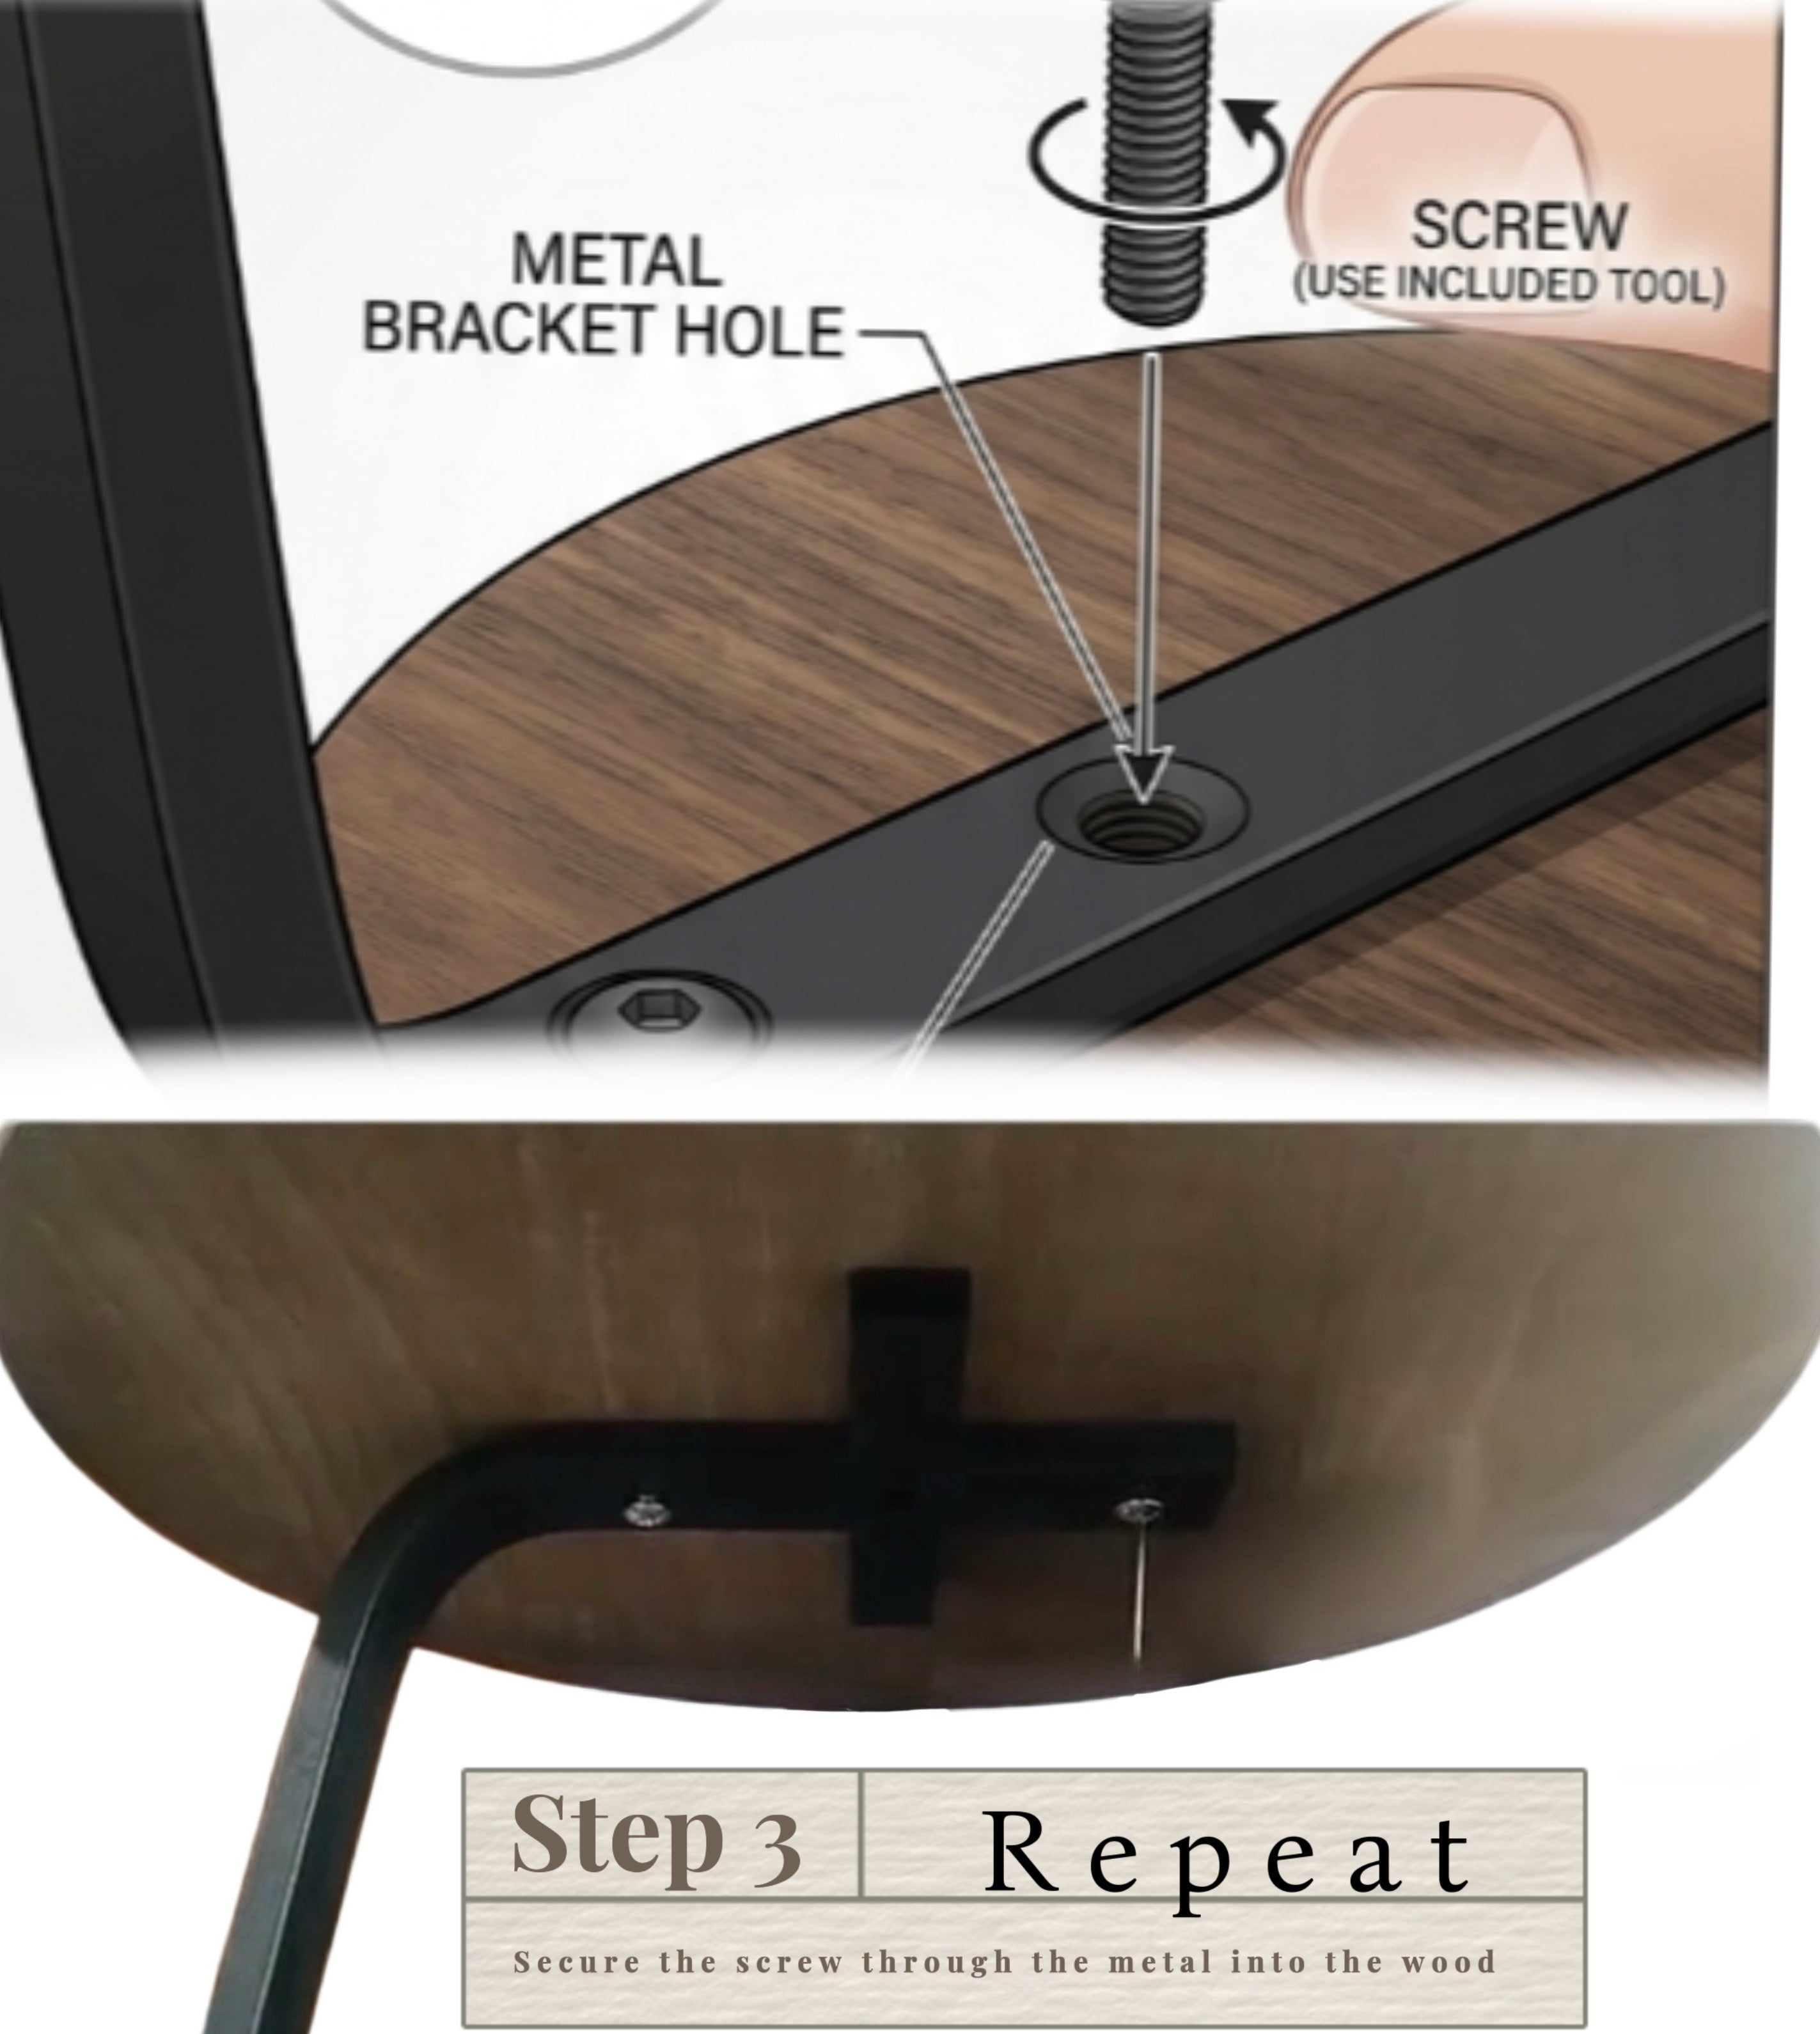
• Step 3: Repeat. Secure the remaining shelves using the same method until the tiered structure is solid.
Phase 2: Structural Support
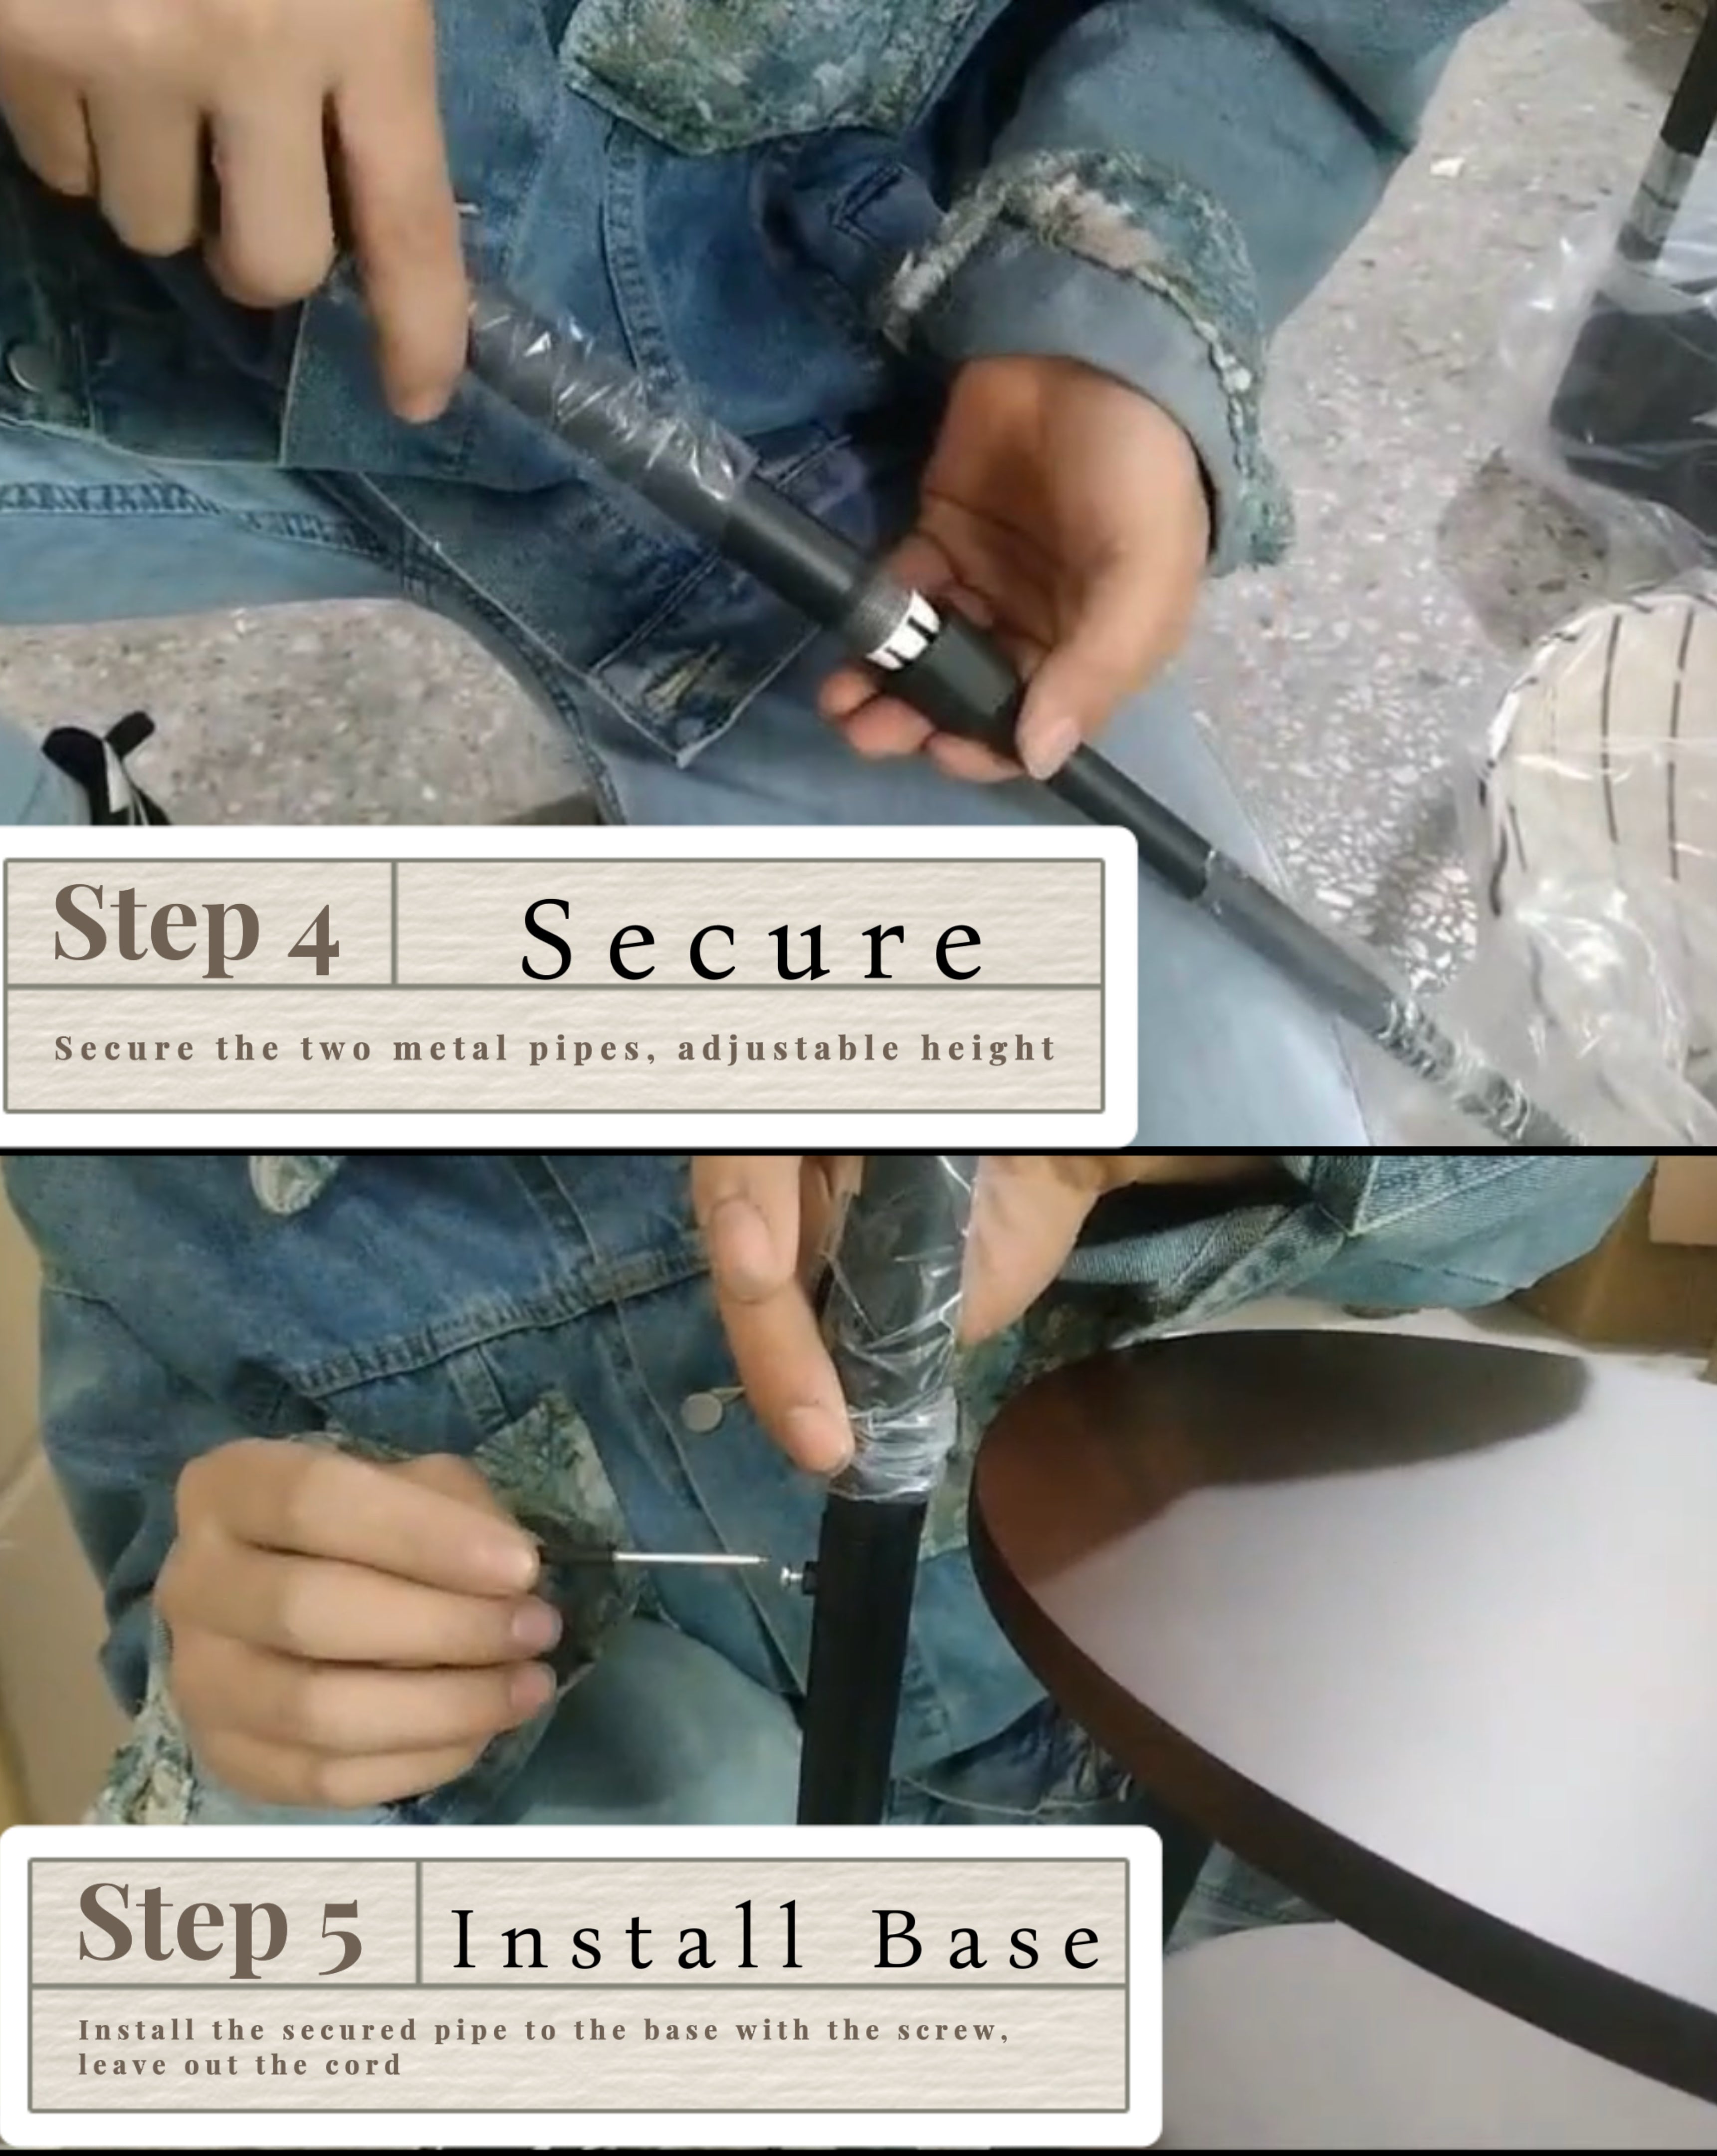
• Step 4: Secure. Connect the two main metal pipes. This is where you can adjust the height to your preference before locking them into place.
• Step 5: Install Base. Attach the vertical pipe assembly to the storage base with the provided screws. Pro Tip: Make sure the power cord is threaded through correctly and not pinched.
Phase 3: The Finishing Touches
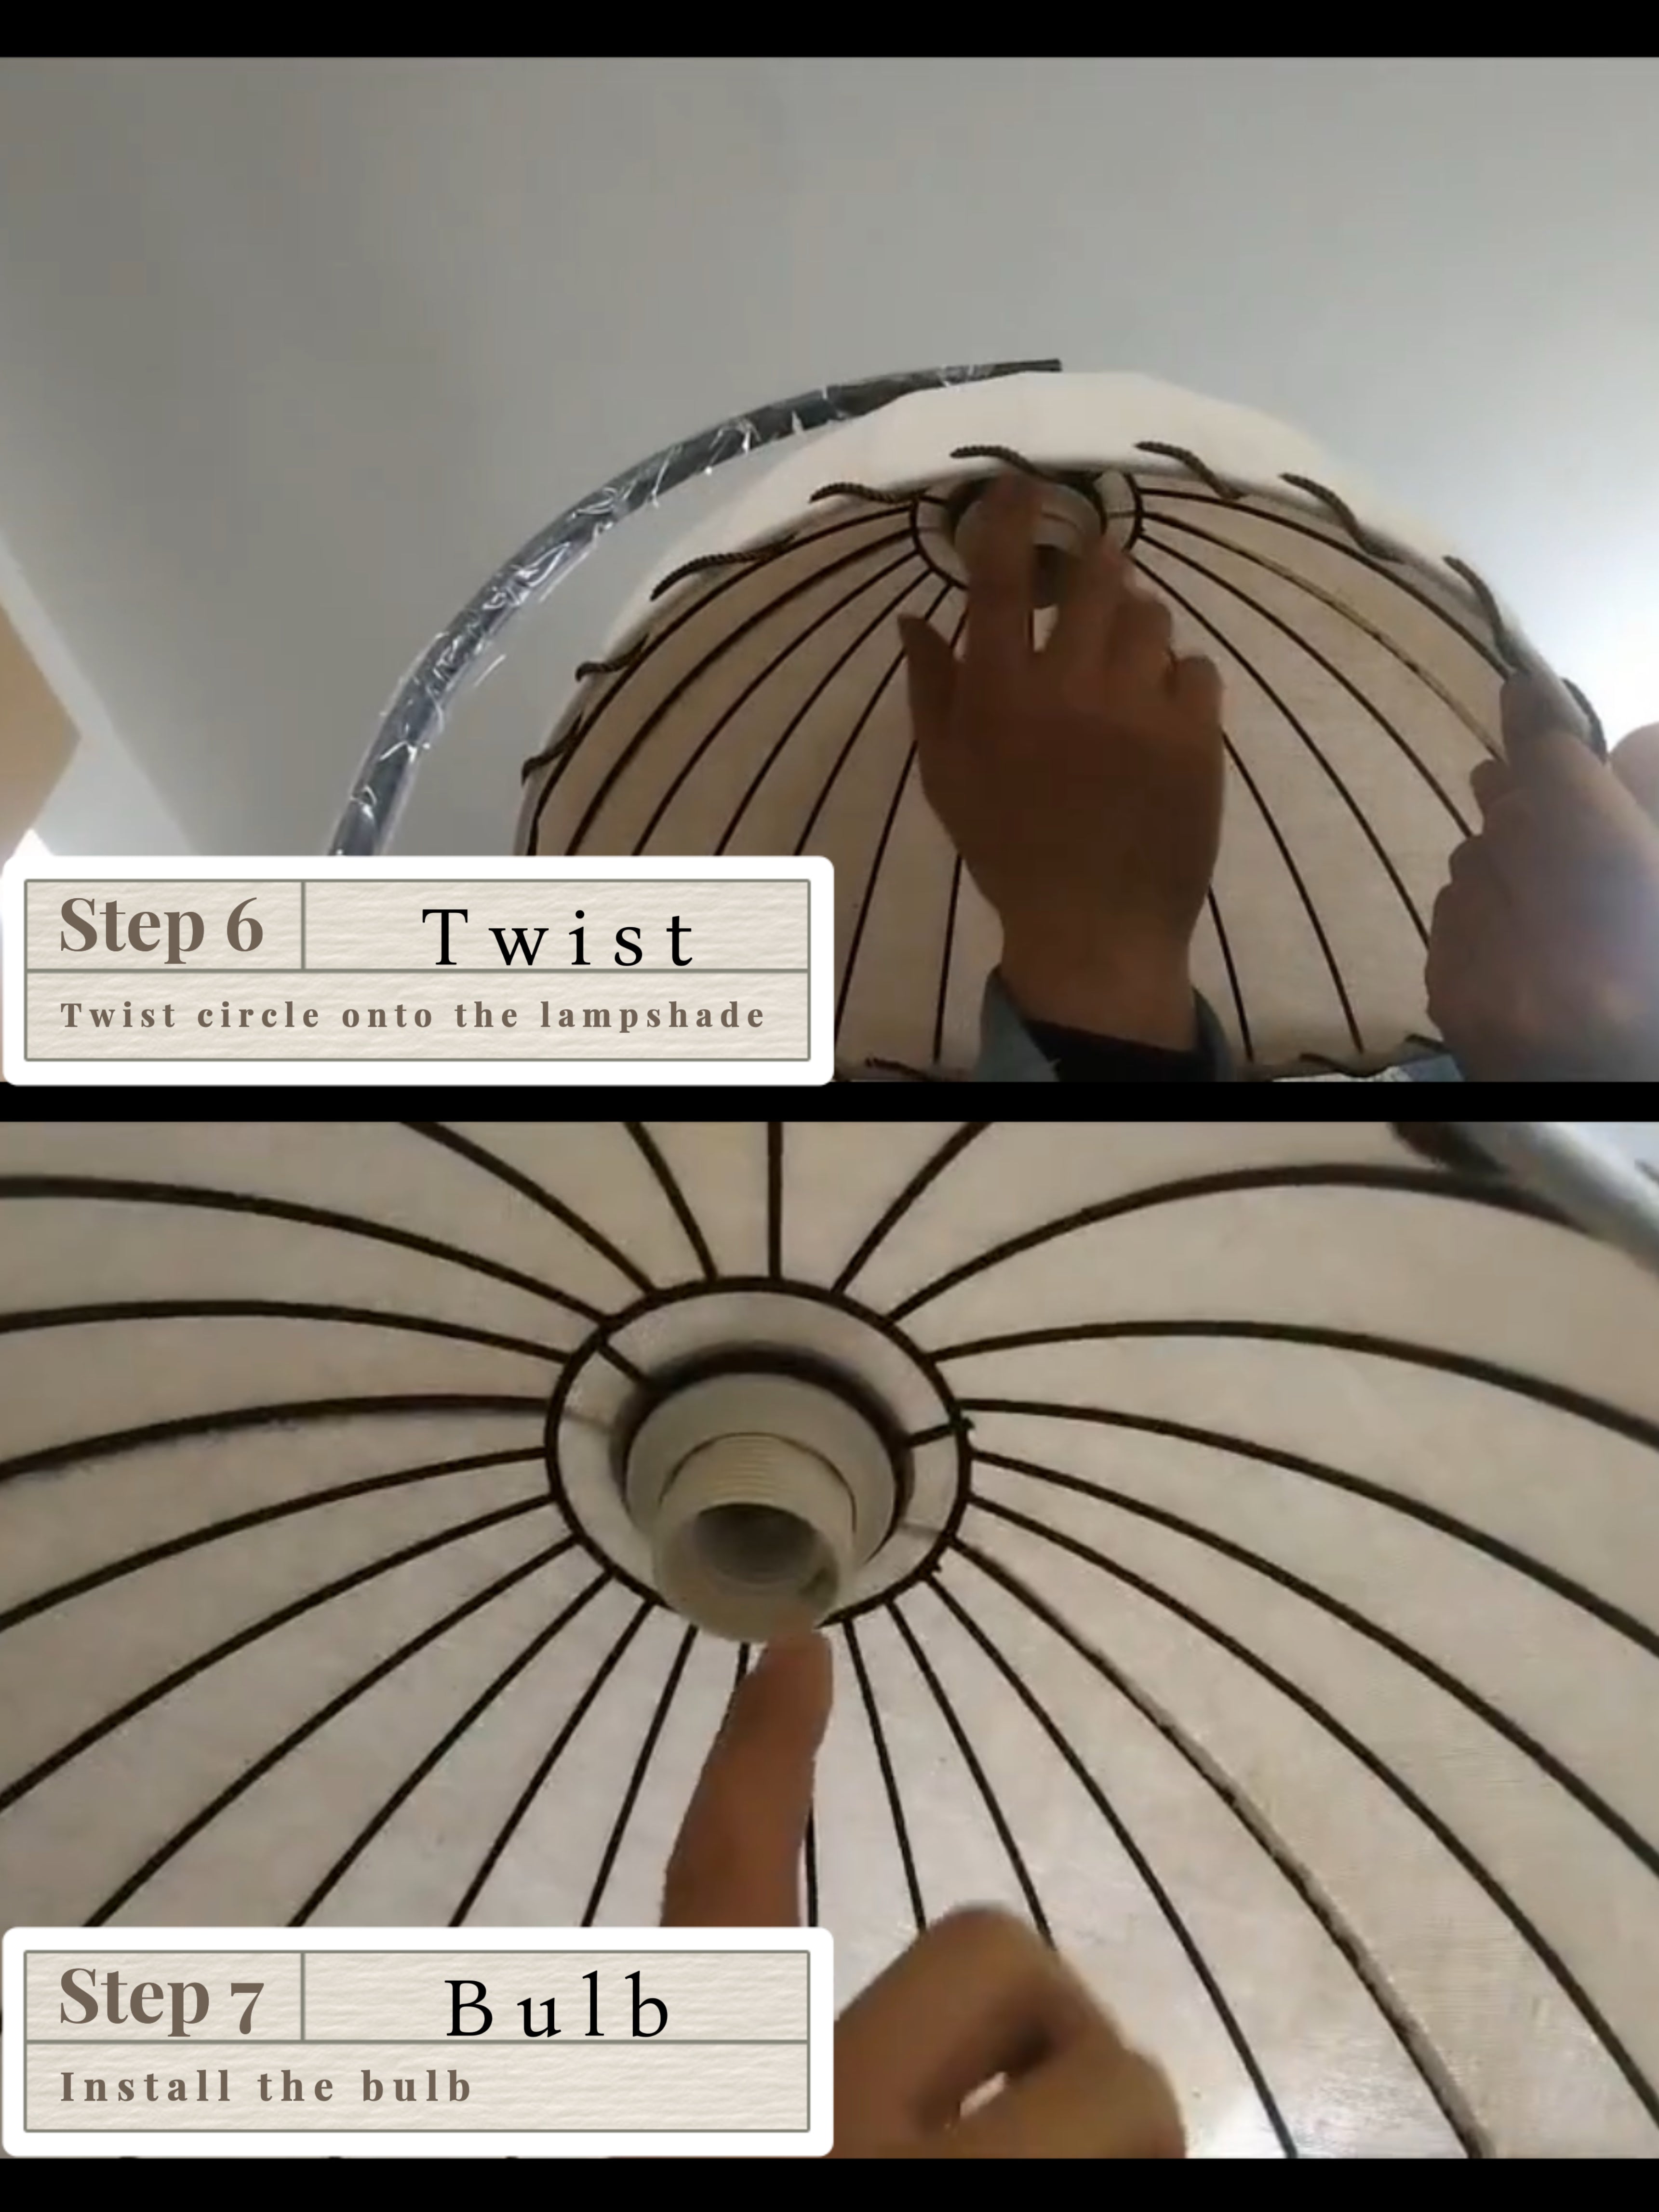
• Step 6: Twist. Take the decorative lampshade and twist the circular attachment onto the socket holder until it is firm and level.
• Step 7: Bulb. Carefully screw in your preferred LED bulb. (We recommend a "Warm White" bulb for that cozy, high-end look shown in the photos!)
Design Tip: How to Style Your Lamp
To truly make this piece pop, try "triangulating" your decor. Place a small trailing plant on the top shelf, a stack of two aesthetic coffee table books on the middle shelf, and a rolled-up neutral-colored knit blanket in the bottom bin.
Ready to upgrade your home lighting? Check out the full collection at Ercmck.com to find the color that matches your vibe.